From Atoms To Particles - The Chamber & Acquiring Parts

|
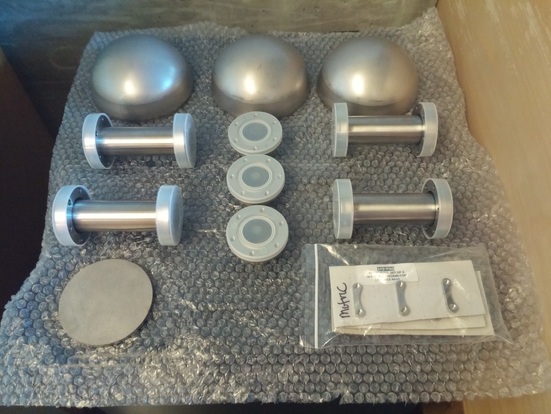
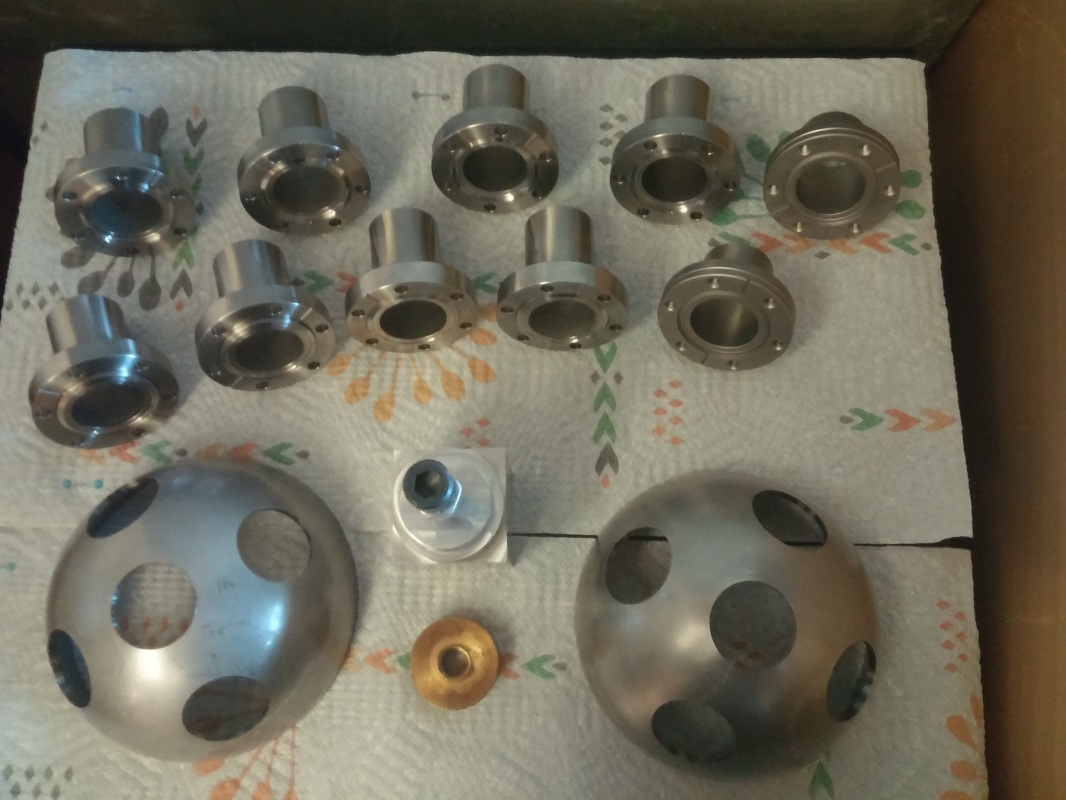
I've been waiting a while to post on this page, the parts are all in for the chamber. In total what I have in the end is 2X6" hemispheres, 2X8" Conflat Flanges, 10X2.75" Half-Nipples, 9 Plate nuts, and 1 Copper 8" Gasket with a total of around $700 for the parts.
|
MACHINING
With help from...
Well, ladies and gentlemen it's about that time....
-Preparations
Machining anything is complicated, add in to that a metal so hard most ordinary shop tools can't cut through, and add in a hell of a lot of inexperience, what do you get? A student going to the central machine shop being quoted a few thousand dollars for some holes in some hemispheres. As it turns out I don't actually have 3 grand to drop on machining so I started thinking, what could I do that didn't involve paying 3 grand for my parts processing. Step 1) To RTFTECHNOLOGIES.org we go. After thorough reading of Andrew Seltzman's beautiful machining documentation I figured out what I needed to do. Essentially the job was this, I had to find a way to drill 2 holes straight through the middle of the hemispheres that were around 1.495" in diameter (which is a whole other story) and then 8 more holes 45° and each 90° from each other. Essentially machining hell, to give you an idea of how exactly ridiculous this job was; when we showed up to MITERS (one of MIT's machine shop--the only one that would let us anywhere within a mile of their tools) we were almost laughed out of the shop. Now the more perceptive of you noticed I said we a few times. By "we" I mean a friend on my floor in simmons hall; Jared DiCarlo, without whom this job would have been beyond impossible. This is someone who can do what a modern CNC can do with only a WWII era bridgeport and dull shop tools. As an aside this is one of the things that I love about MIT, the sheer talent that one finds here, it's truly amazing. Below I've included some pictures (with more to come) of the machining process. Now if you are in a very well equipped machine shop with a lot of experience follow Andrew's documentation (http://www.rtftechnologies.org/physics/fusor-mark3-hemisphere.htm) but if you are more inexperianced like me or less well equipped than what would be ideal, I will try to summarize for you at length how you too can machine your own shiny set of hemispheres.
-Securing the Hemisphere AKA
There is something to be said about us MIT kids, most of us are here not because we've worked with the cutting edge but because we've created the cutting edge with the dullest tools....literally
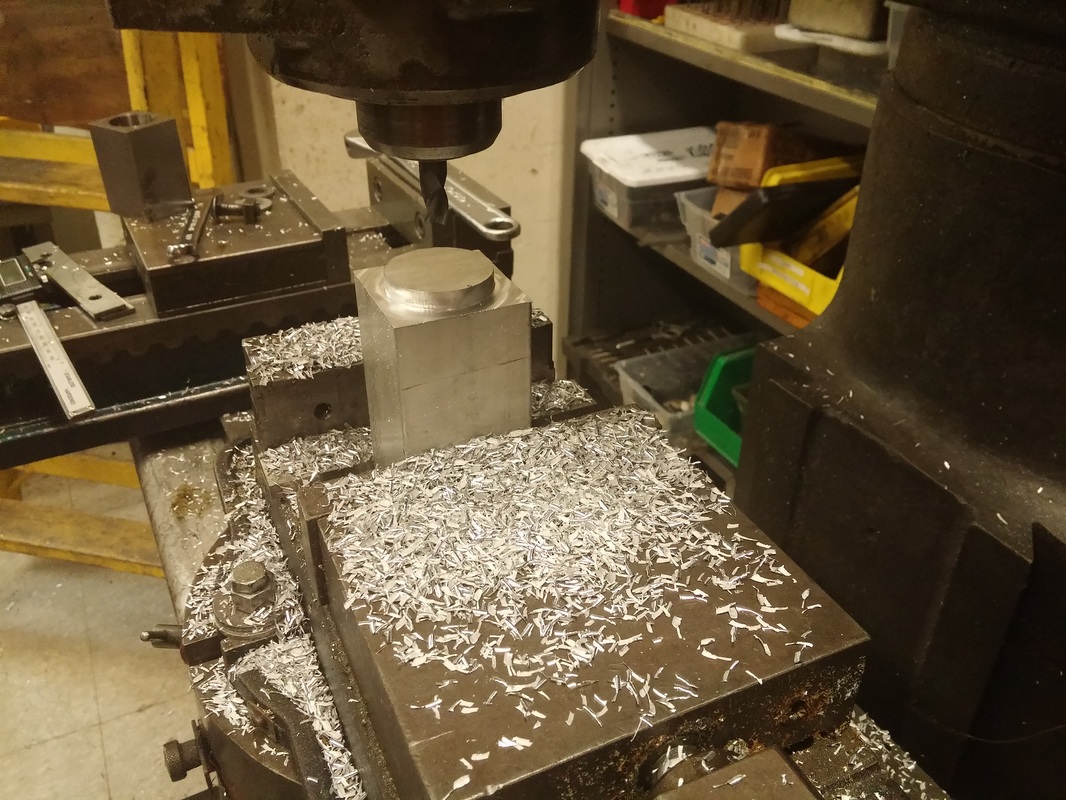
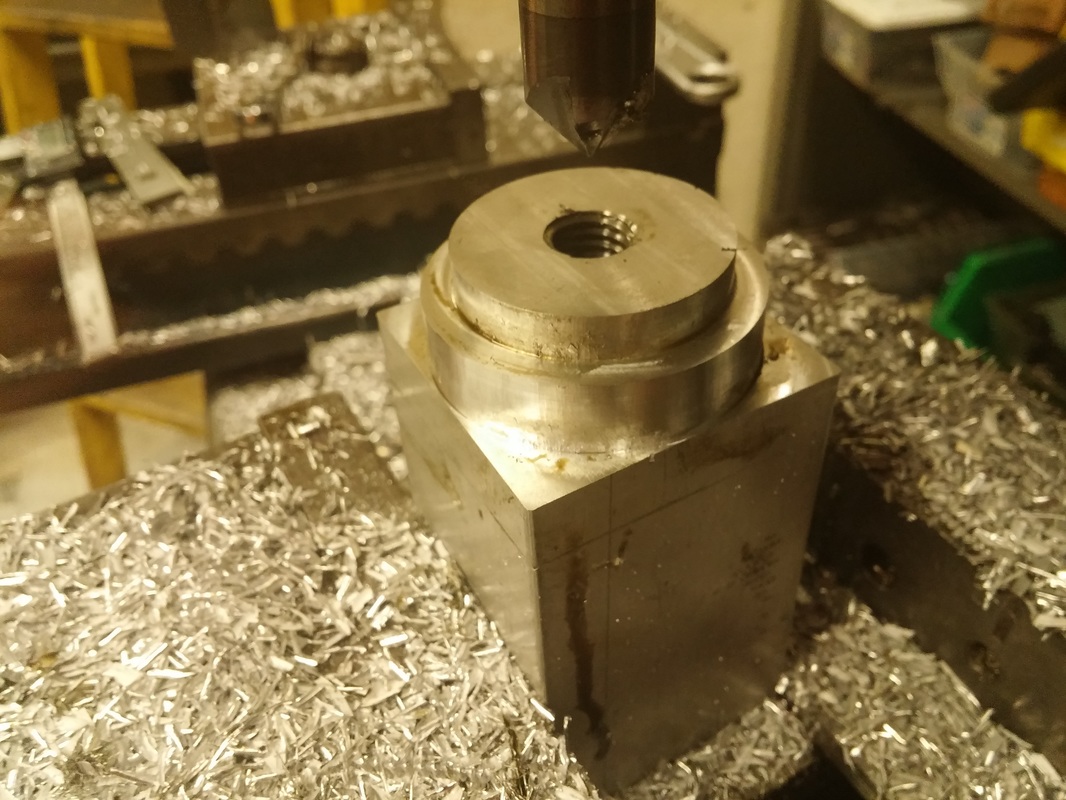
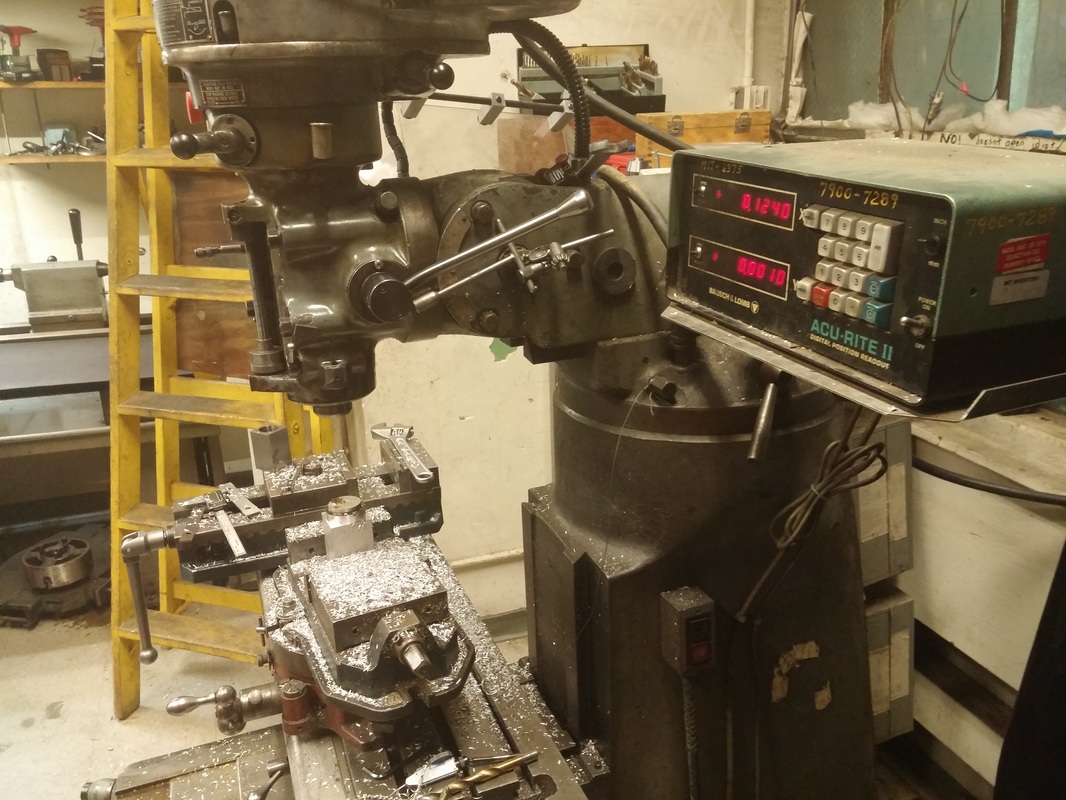
So there we were...staring at the hemispheres (well I was mainly just standing in the way of everything) but I'll tell you how it went from the beginning. All you machining purists, look away now or you will cry when you see what we did. Because there wasn't a chuck that would open wide enough to accommodate the 6" "hemispheres" we needed to get clever with our clamping, I mean REALLY REALLY clever. Step one was to create something that would accurately hold the hemispheres. This ended up being an aluminum block who's edges were trued up with an end mill on said WWII era bridgeport. Because it made really poor contact with the hemisphere we ended up making the top of the block a circle, as shown below. The end mill was also used to this end and it worked wonders. This is the first image, where the second image is the same block, only tapped. What you don't see here is about an hour's worth of zeroing in, with a dial indicator, on the the placement of the rotary table (below the vice), the vice, and the piece on the vice with the drill head or chuck of the bridgeport. It's beyond me how this was actually done but one day maybe ill upload an explanation of the process, the third picture is to show what needed to be aligned.
-The Next Step
The difficult takes a few minutes...the impossible as it turns out will only take a few hours
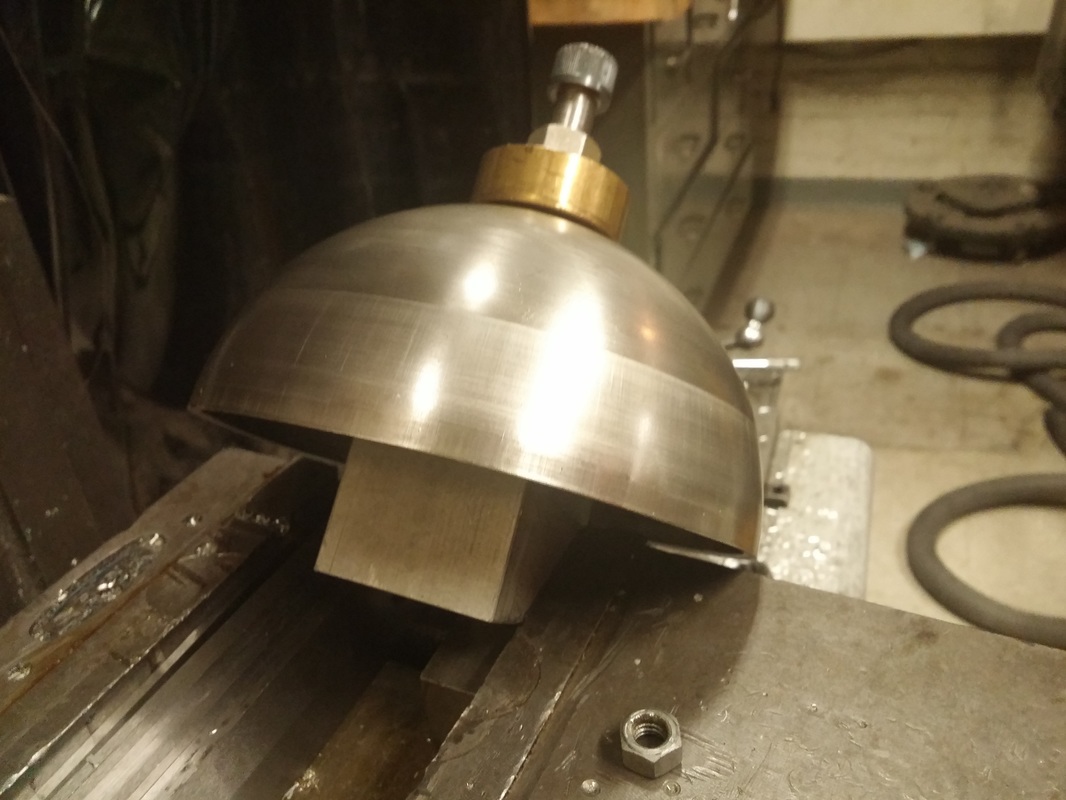
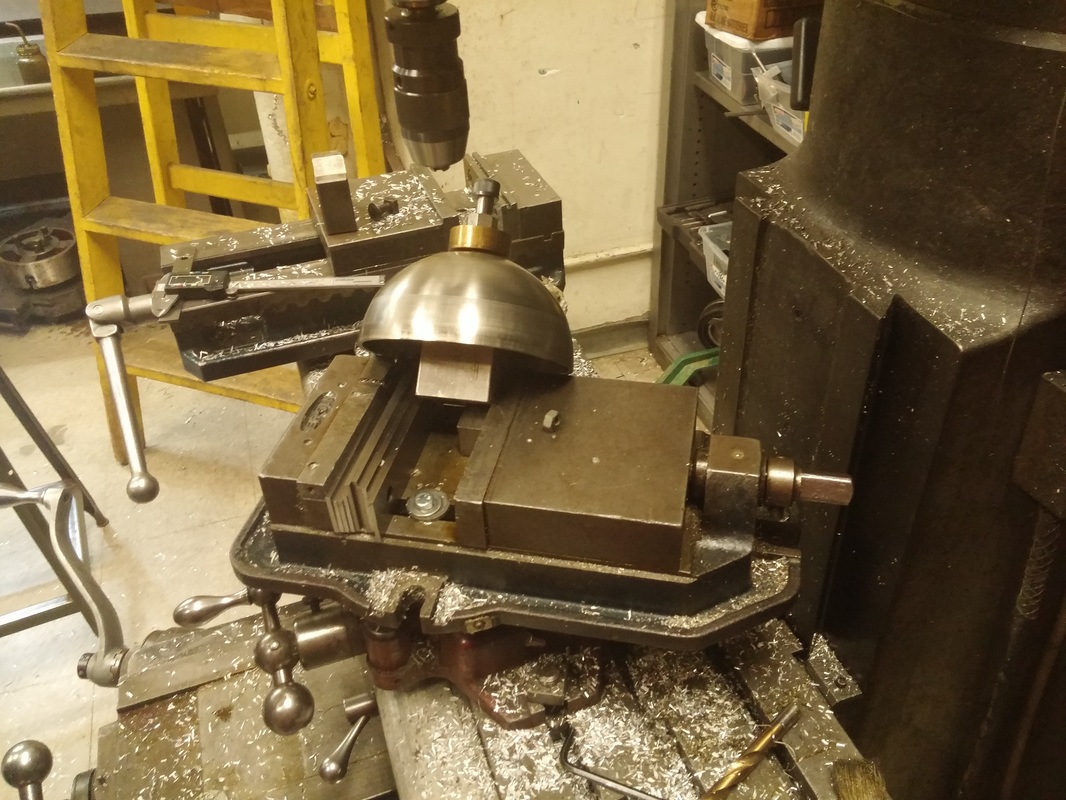
Now the trick was securing the hemisphere to this block in a very solid way at 45° in a vice that was far too small for the 45° block coupled with the aluminum holder, so it was time to get clever, a few head-scratchings, parallels, lathes, dull lathe tools, and end mills later we figured it out. The first two pictures were of the fixture that went into the hemisphere and the second is the bolt fixture screwed into the block. If you are trying to do this, you will again need to indicate off the hemisphere (and hope that it's reasonably round) in order to center it so you can drill. More on this later.... And there we had it, a 45° hemisphere that was surprisingly very solidly held in the vice. Next was the make it or break it step...quite literally.
-Into the Hole
Down the rabbit hole we went, and as you might expect it got crazier as we went further
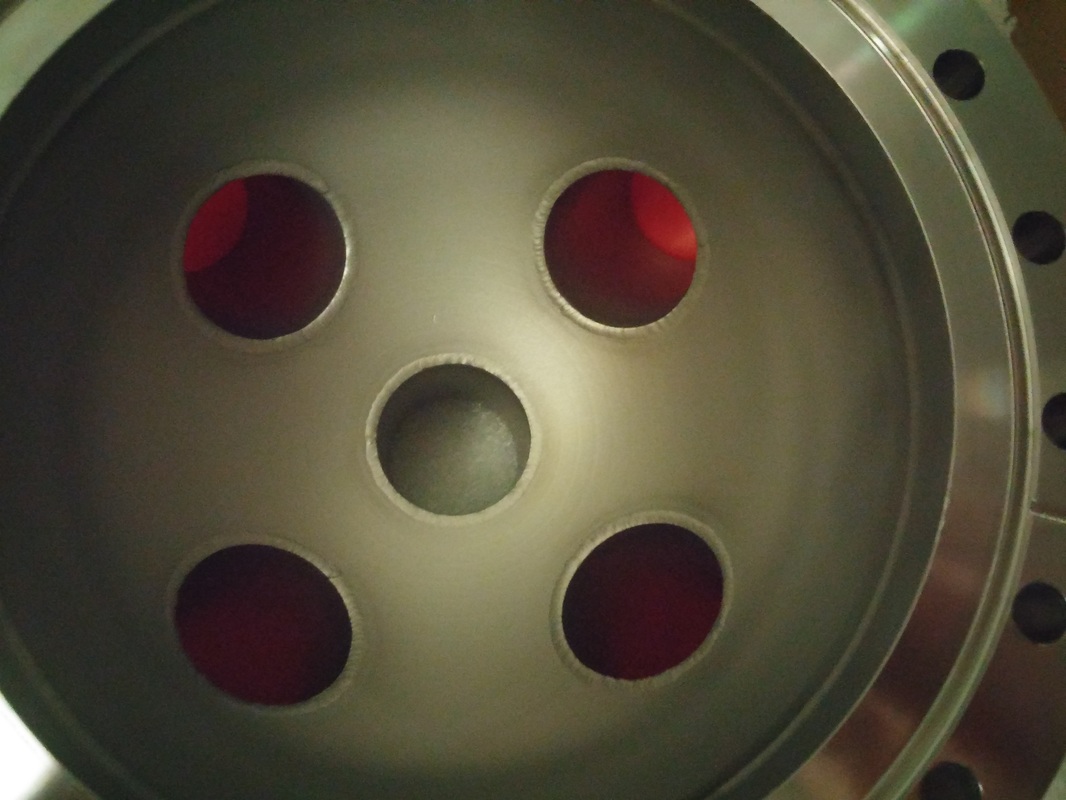
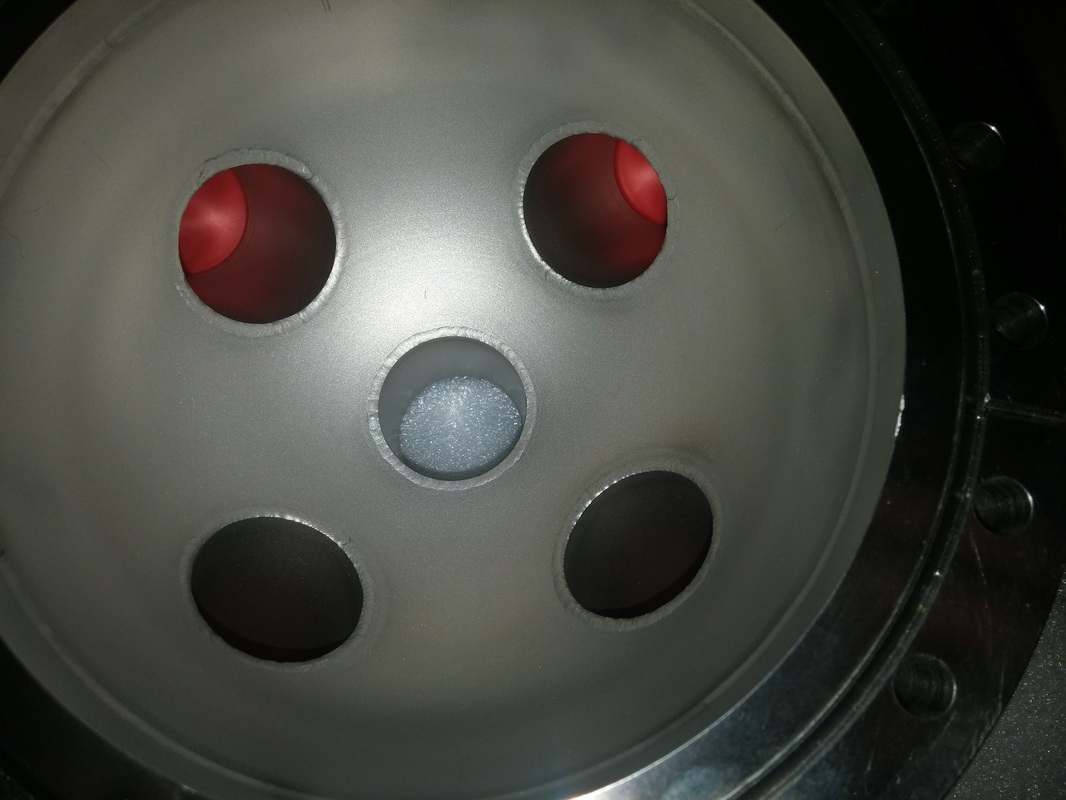
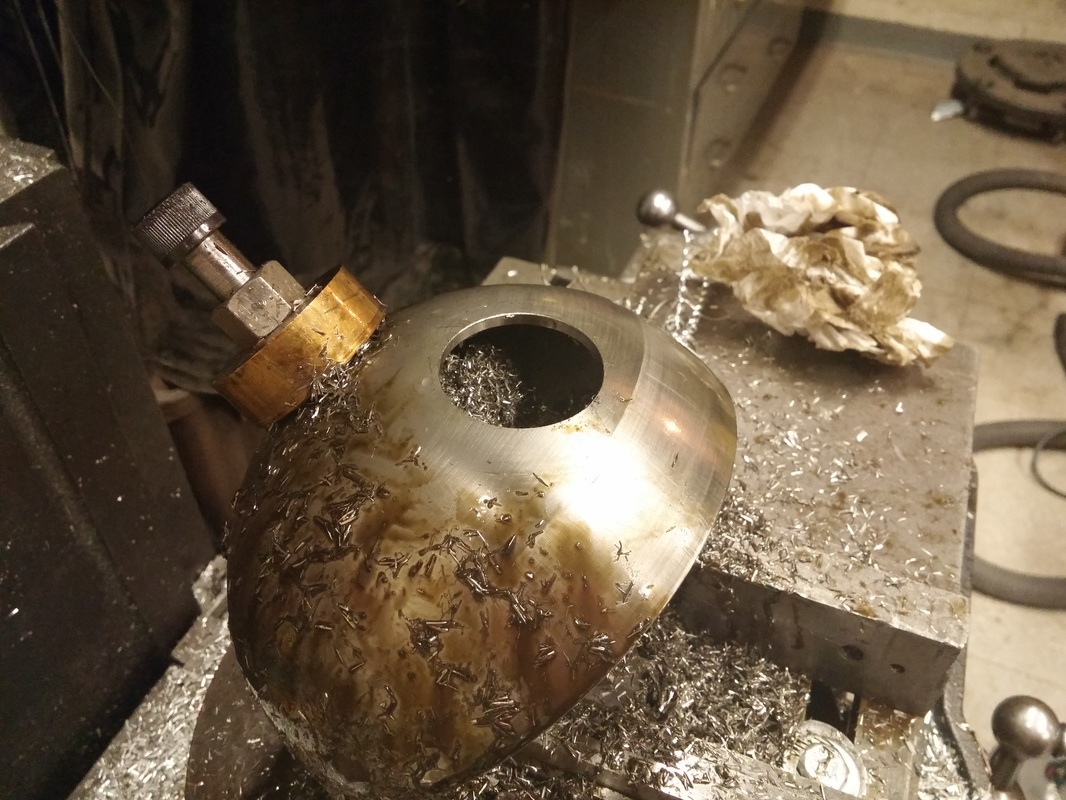
Now having aligned the central axis of the rotary table with the vice with the hemisphere with the drill chuck we started to plunge with the end mill into the hemisphere. The next picture will serve to document that process. Now what follows is a bit more complicated. The hemisphere is drilled and then the bridgeport table is drawn out further away from the bridgeport so as to increase the radius. Now this is a bit more complicated but imagine the end mill as a pencil tip on a piece of paper. You can rotate the pencil tip and you will get a small solid circle equal to roughly the radius of the pencil tip but now imagine you (holding the piece of paper steady and being able to draw perfect circles) pull the pencil tip outward toward you and you start to rotate the piece of paper such that as the tip draws on its surface a larger circle is formed with new diameter which should be 2 times the radius. This is essentially what we did only with an end mill instead of a pencil and a metal hemisphere on an angle instead of the piece of paper. As hemisphere (paper) was rotated with the rotary table the end mill took off material in a circular fashion removing more an more material as the radius increased. Because our setup was fairly questionable (although seemingly solid) there was some chatter at various points of the passes (each trip of the end mill around the circle). The picture below show the results of this and the hole getting closer and closer to where it had to be. Toward the end we only took a pass of a few thousandths and used an de-burring tool to ensure the nipple could press fit in without worry. And I would just like to note that finish is with an end mill, not a boring head, not a boring bar, not a(n ) (insert special tool name here), just a plain old end mill, look at what work it can do!
A Few Holes And A CNC Bridgeport Later....

-Oh, and by the way...
Well so okay, as it turns out I said that the parts were made on a world war 2 era bridgeport with questionable fixtures. I would like now, in this section, to amend my statement, the above parts CAN be made in that setup quite reliably and successfully, the catch is that they will take ages give or take a few years to finish. To show you that I'm not a hypocrite I'll make the following promise: The first hole that you saw was indeed machined using the proposed setup, so it can be done. So here's the thing with anything related making your own table top thermonuclear fusion reactor, people will think that you're crazy, and you are--I mean that's why you're building one right? But the trick is to convince those people that you know what you're doing if you happen to require their resources. As it turns out MIT is home to many crazy ideas so it wasn't as difficult for me to be doing this work here, but for many of you this is not the case. Most people reading this I suspect are just starting out in their fusion adventures so chances are you won't know much about machining or won't have many resources. If you find this to be the case and you follow the "guide" above you will have to deal with a lot of vibrations (chatter), don't worry even though the above setup yeilds a lot of chatter in some areas keep going until that hole is big enough that your heart is content. If you can find a CNC guided anything use it, i'll say it again USE IT USE IT USE IT USE IT USE IT! It turns a month's job into a weekend job. Long story short, we found a shop that let us near their shiny CNC and as it turns out no one was using it, so we gave it a run for it's money. My advice to other youngsters working on such a project, find someone that can machine and learn all you can from them because this project could not have been done as cheaply without such resources. In my case my friend outright helped me machine everything but some people may not be as lucky so learn what you can, and then go learn some more until you know how to do it with your eyes closed if you really want to be sure that you will succeed no matter what. Now, off to welding we go....Stay tuned folks
And So It Goes, The Parts Are Off To Welding
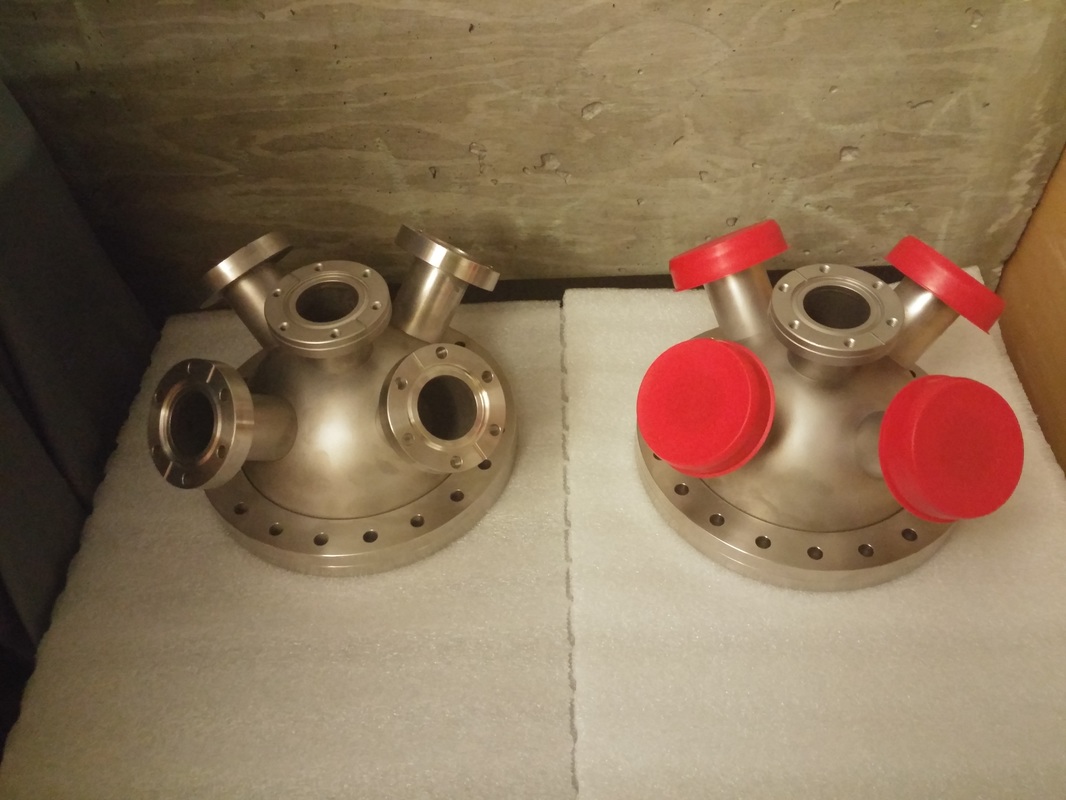
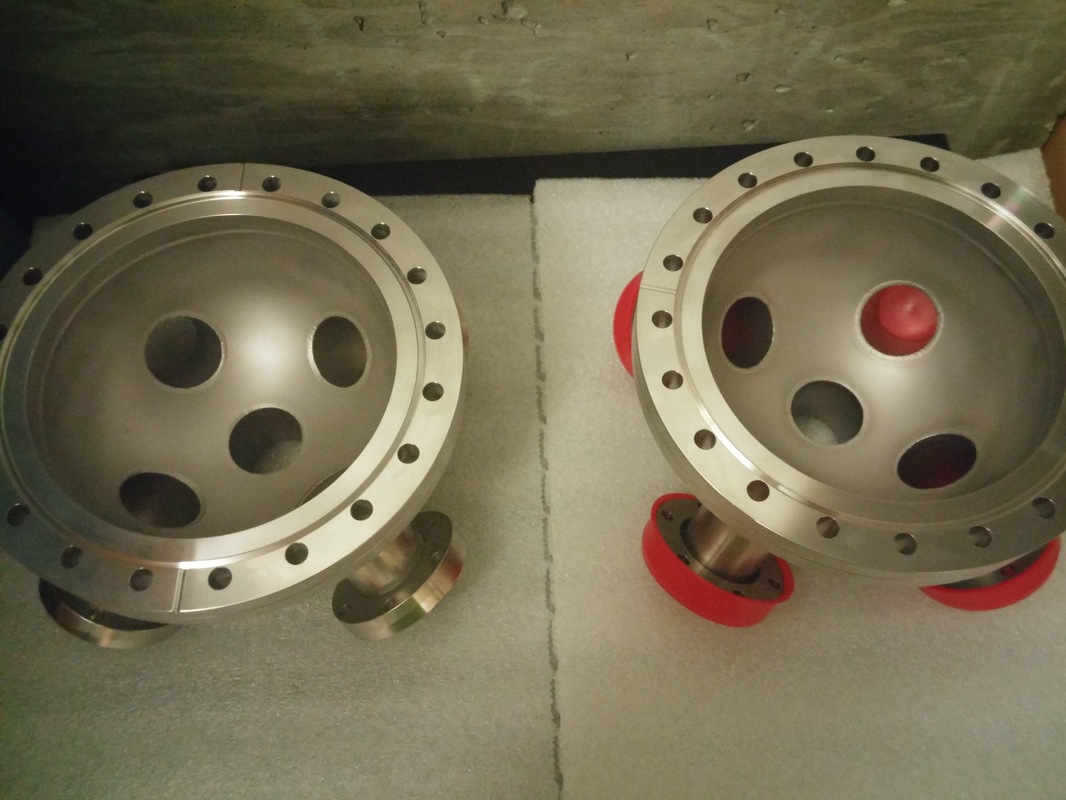
Parts have been sent to Sharon Vacuum in Massachusetts, who will be doing the welding and helium leak test on the part for about a factor of 10 times less than what any other shop will weld for. So what have we learned thus far? Well lesson nr. 1 build your own fusor chamber, it's soo worth it! Don't be afraid to get your hands dirty and mess up, it happens, that's how life works.
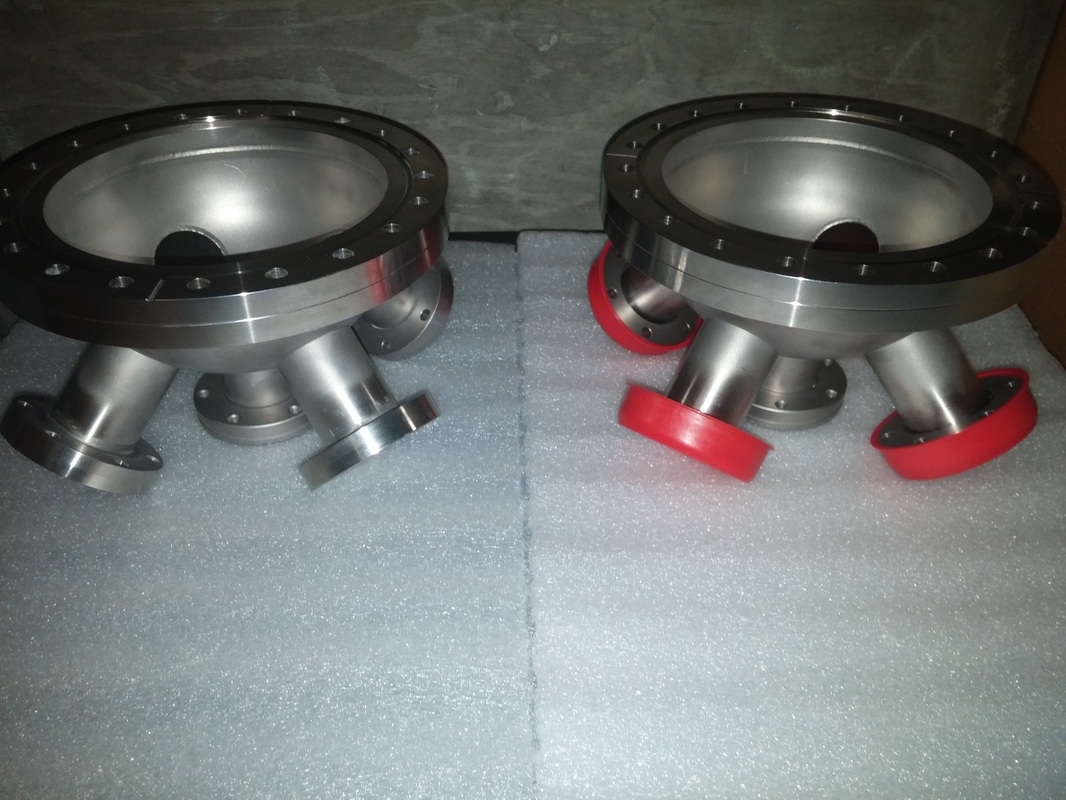
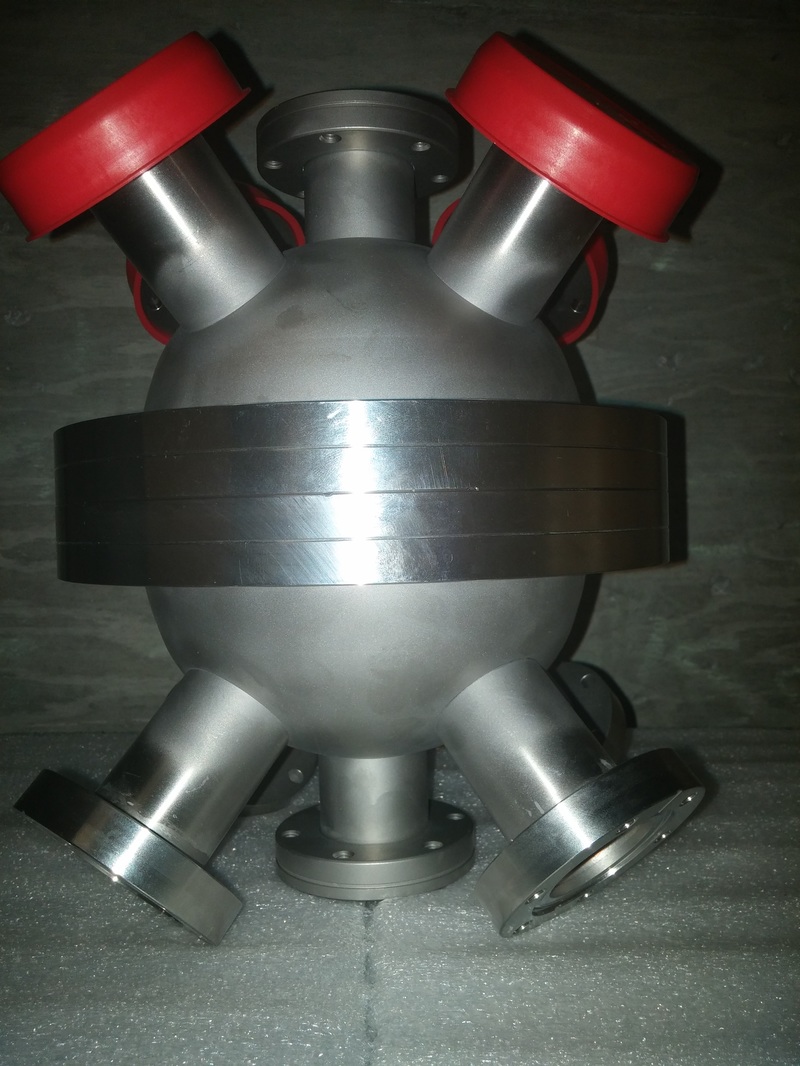
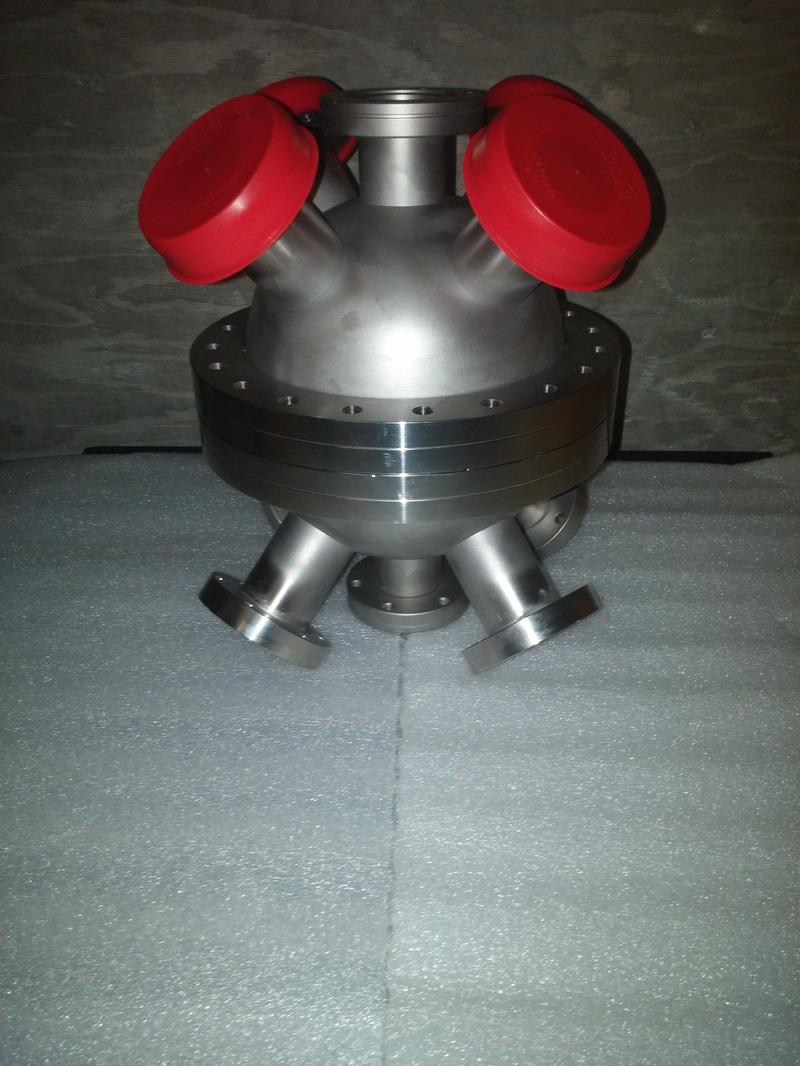
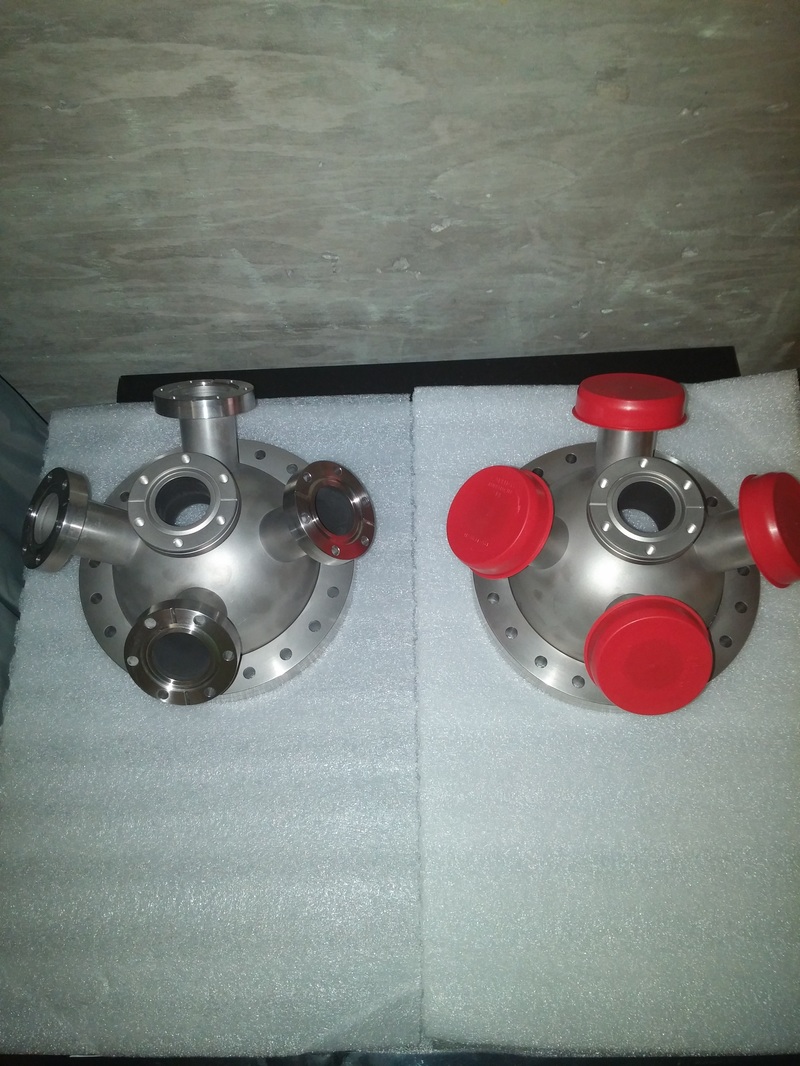
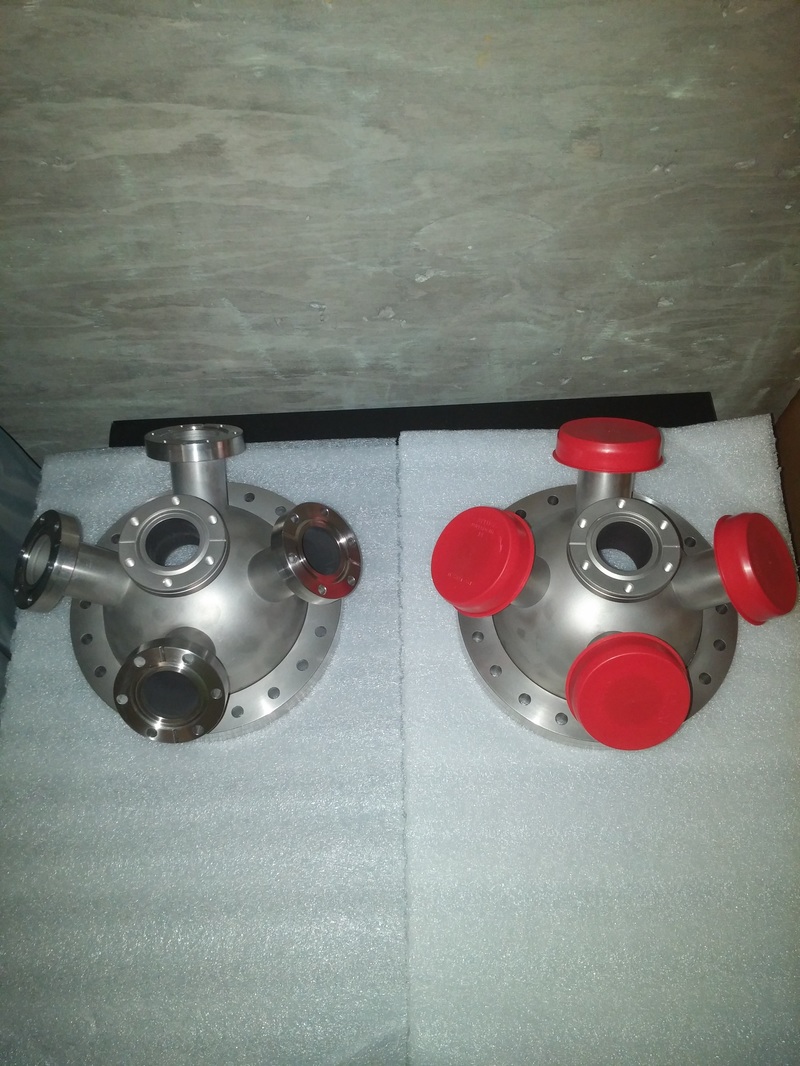
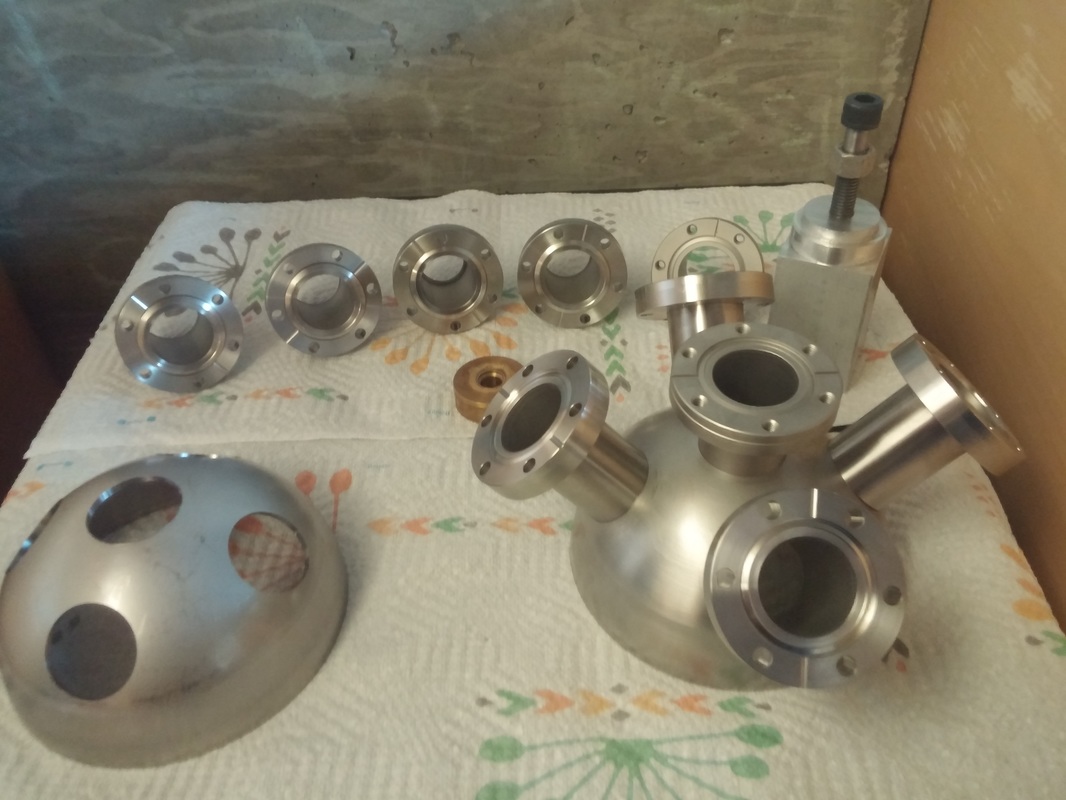
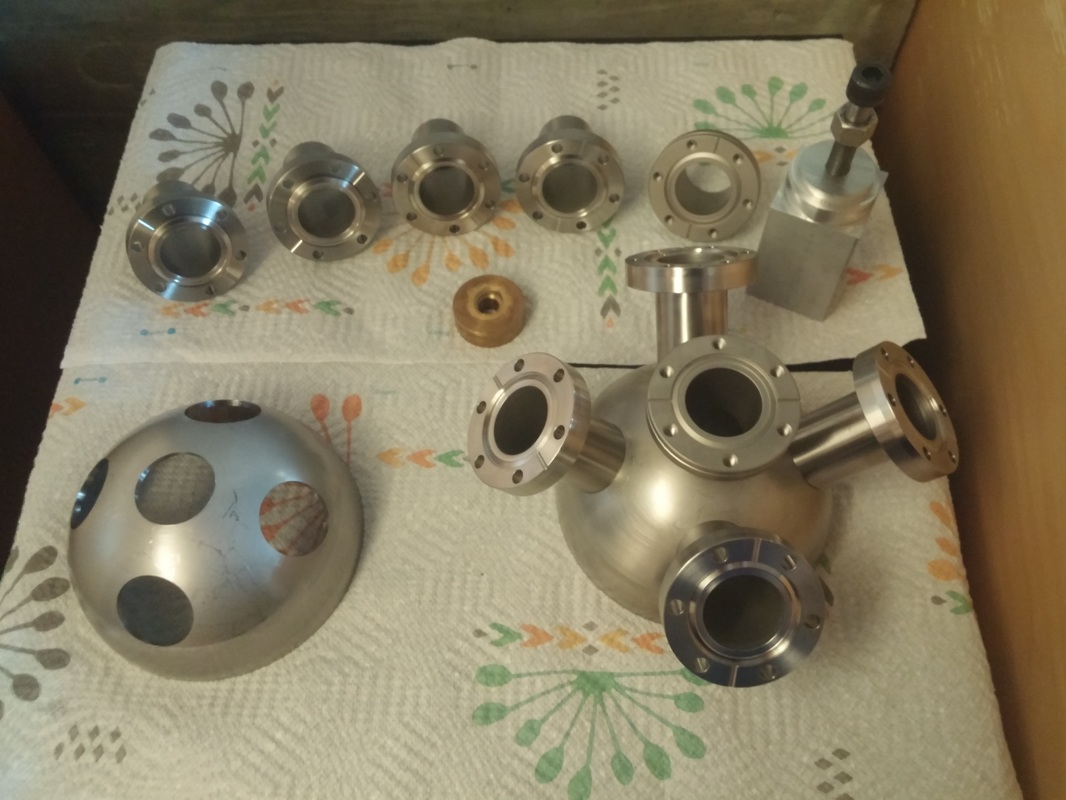
Months Of Work Finally Pay Off
So after all that machining the chamber is finally done. The chamber was sent of to Sharon Vacuum in MA who does EXCEPTIONAL work for EXCEPTIONAL prices. For Drilling and welding MIT Central machine shop quoted me at $3.5k where as machining it myself and having Sharon Vacuum do welding cost only $300 (with Helium leak testing included) and look at what quality you get! If anyone is preparing to undertake such a difficult task as building your own chamber I urge you to go to Sharon Vacuum for welding, their price and quality simply cannot be beat in my experience. A few more details about the chamber: So hemisphere was made in such a way that one hemisphere will have rotatable ports off axis, which is what the red caps are, and the other half will all be non rotatable. The rotatable section will be home to some rf heaters in the future and anode layer ion sources (currently in the making (will document those when I have time)) Overall this was a great learning experience, sure it was hard but it was super fun! Don't be afraid to get your hands dirty! There is a reason why some of MIT's mottos are "Learn by doing" and "Mind and hand" because it really does work. Keep fusing!